Easily Submit LIC NEFT Details Online
Table of Contents
As we know, LIC had been issuing Cheques to settle insurance claims, maturities, and other benefits until 2011. After that, LIC made it mandatory for the policyholder to submit the “NEFT Mandate Form” to receive any type of payment. Therefore, policyholders started submitting their bank account details via the offline mode “NEFT Mandate Form”. As we see, LIC regularly adds more and more important services to its online portal that are more useful to us. Especially, in these days of pandemic situations, we cannot move freely. Good news! The corporation has launched an online provision on Jul 1, 2020, for submitting ‘LIC NEFT Mandate Form’ Online. No need to visit LIC Office, stay safe at your home and you can register the NEFT Mandate Form details online.
Why do we need to submit the NEFT Details?
Currently, the corporation settles all its claims directly into the policyholder’s bank account. Therefore, the NEFT details must be recorded in the policy; otherwise, the payment will not be processed.
How can I submit the NEFT Mandate Form Online?
Before you start the process of registering the NEFT details you must have the following things ready. Firstly, you must be a registered user on the LIC’s e-Service portal. Here, we are assuming that you are already registered on the LIC e-Services portal.
- Scanned Copy – Cheque, Signature & PAN Card
So let’s see the NEFT Details registration process online.
 STEP 1: Log in to LIC’s e-Services Customer Portal
Log in to your LIC e-Services account using your User ID and Password at LIC’s e-Services Login.
 After successfully logging in, you will see a flash message of “Online NEFT Registration facility is now available to Customer Portal Users. To avail, the facility, click here”.
 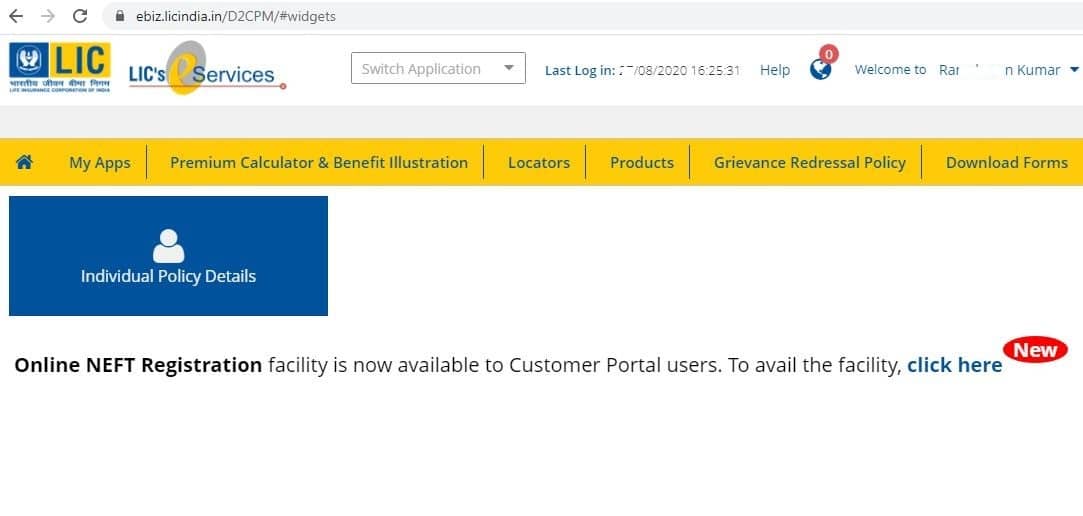 Here, you have two options to proceed with. Click on the link “Click Here” directly. Or, you can also take the option by clicking on “Individual Policy Details”. If you take this option then the next screen will look like this.
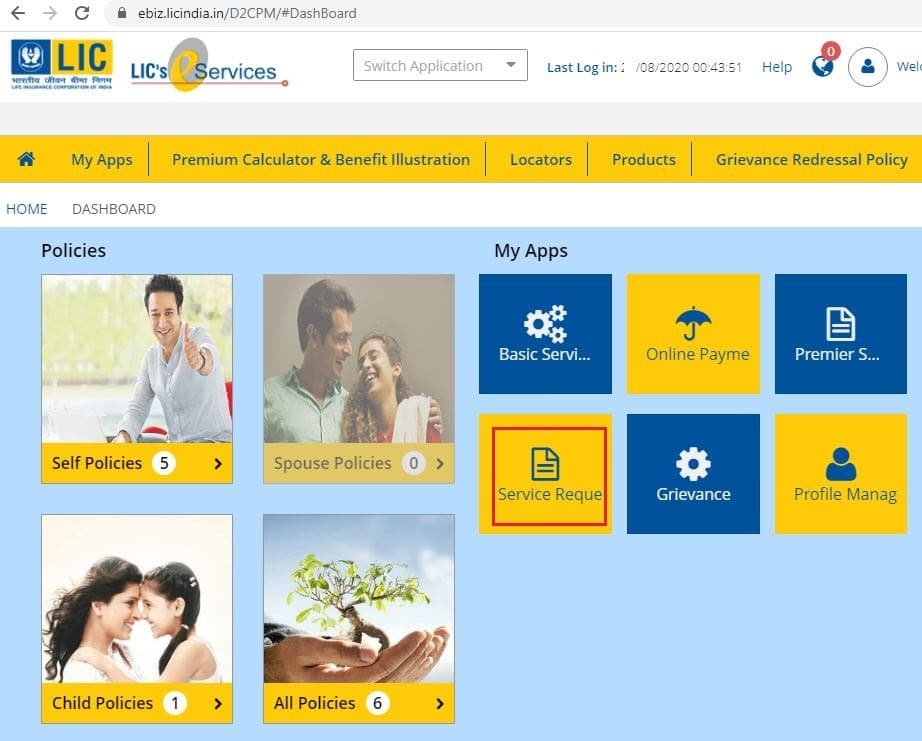
STEP 2: Select Service Request
Here, you have to take the option “Service Request”, click here. Next screen will appear like this:  If you had taken the option of “Click Here” then also, you would have come up to this page. Select Service Request to NEFT Registration from Dropdown Menu like this:
 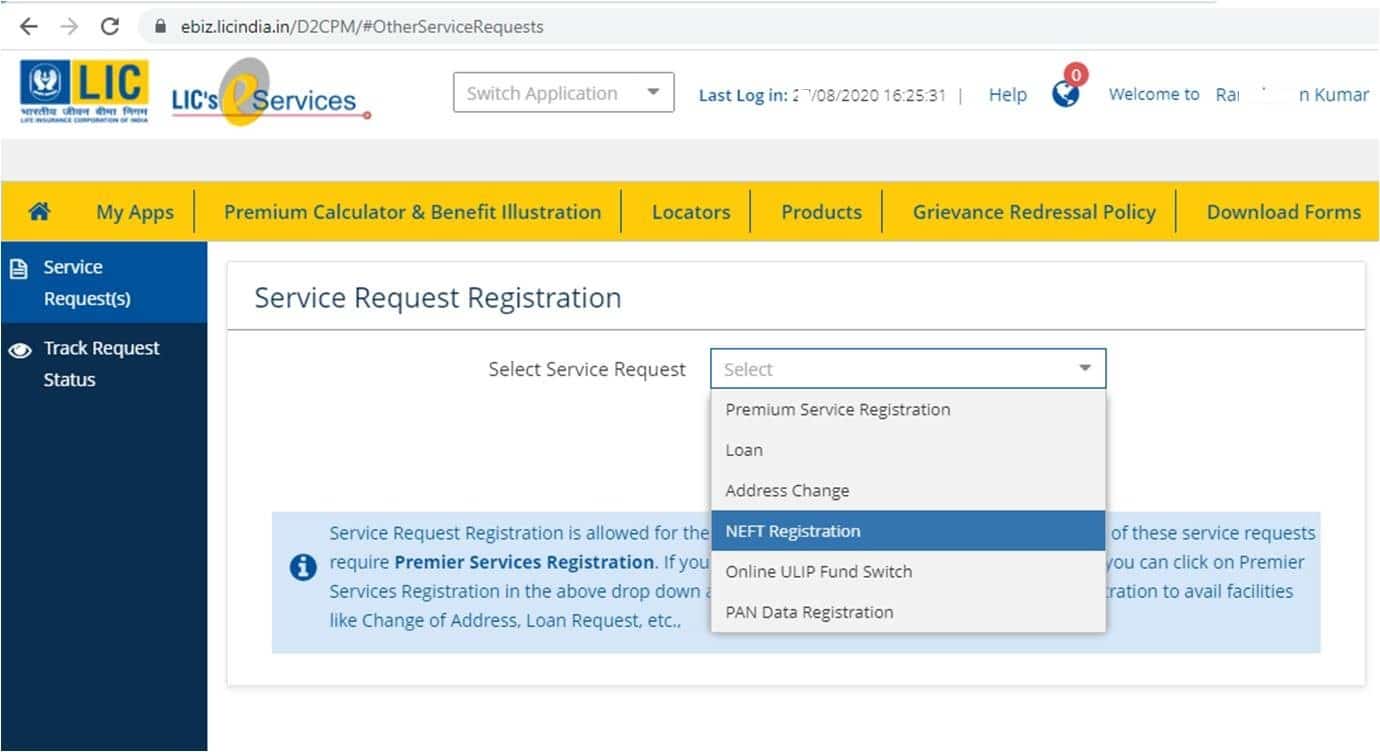 If you have selected NEFT Registration then the next screen will appear like this:
  Here, you see the required documents along with the conditions you have to follow. Make sure you must have the scan copy of:
- Your Signature,
- Bank Account Cheque &
- Your PAN Card
STEP 3: Select one of the Eligible Policies
Now, click on the checkbox that you have understood the conditions and want to proceed ahead. Click on the “Proceed” button. It will take you to Policy No. selection page like this: 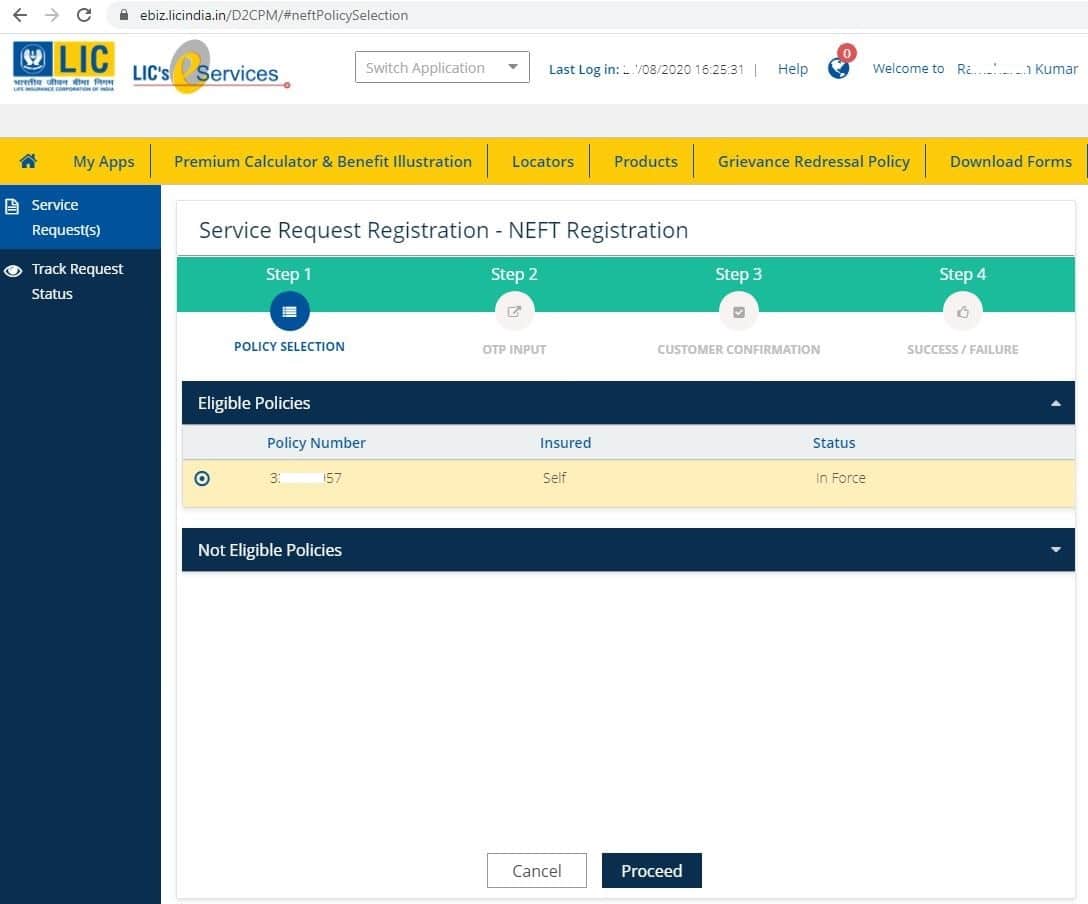
STEP 4: Enter OTP
Here, you can see the number of eligible policies. It depends upon how many policies you have taken. You have to submit NEFT Details for each and every policy. Here, select any one policy no. and click on “Proceed”. It will redirect you to the OTP screen as: 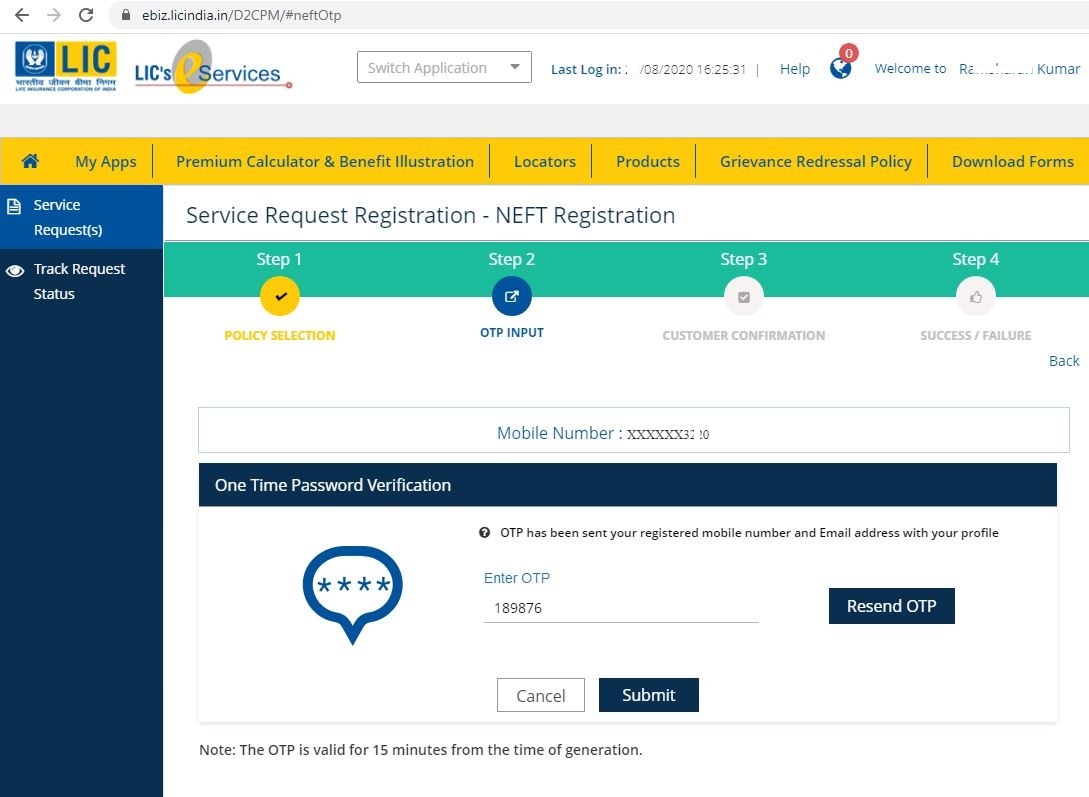 You will receive an SMS for 6 digits OTP on your mobile no. like this:
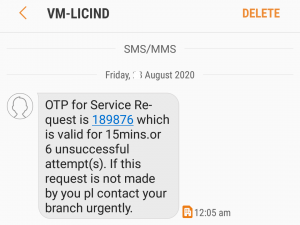
STEP 5: Enter IFSC Code, Account Type, Account No. & PAN
After entering OTP, click on “Submit”. Sometimes, you do not receive SMS, SMS is delayed, Correct SMS is said to be wrong. So, don’t panic and take the “Resend SMS” option. If it is successfully validated then you see the NEFT Form: 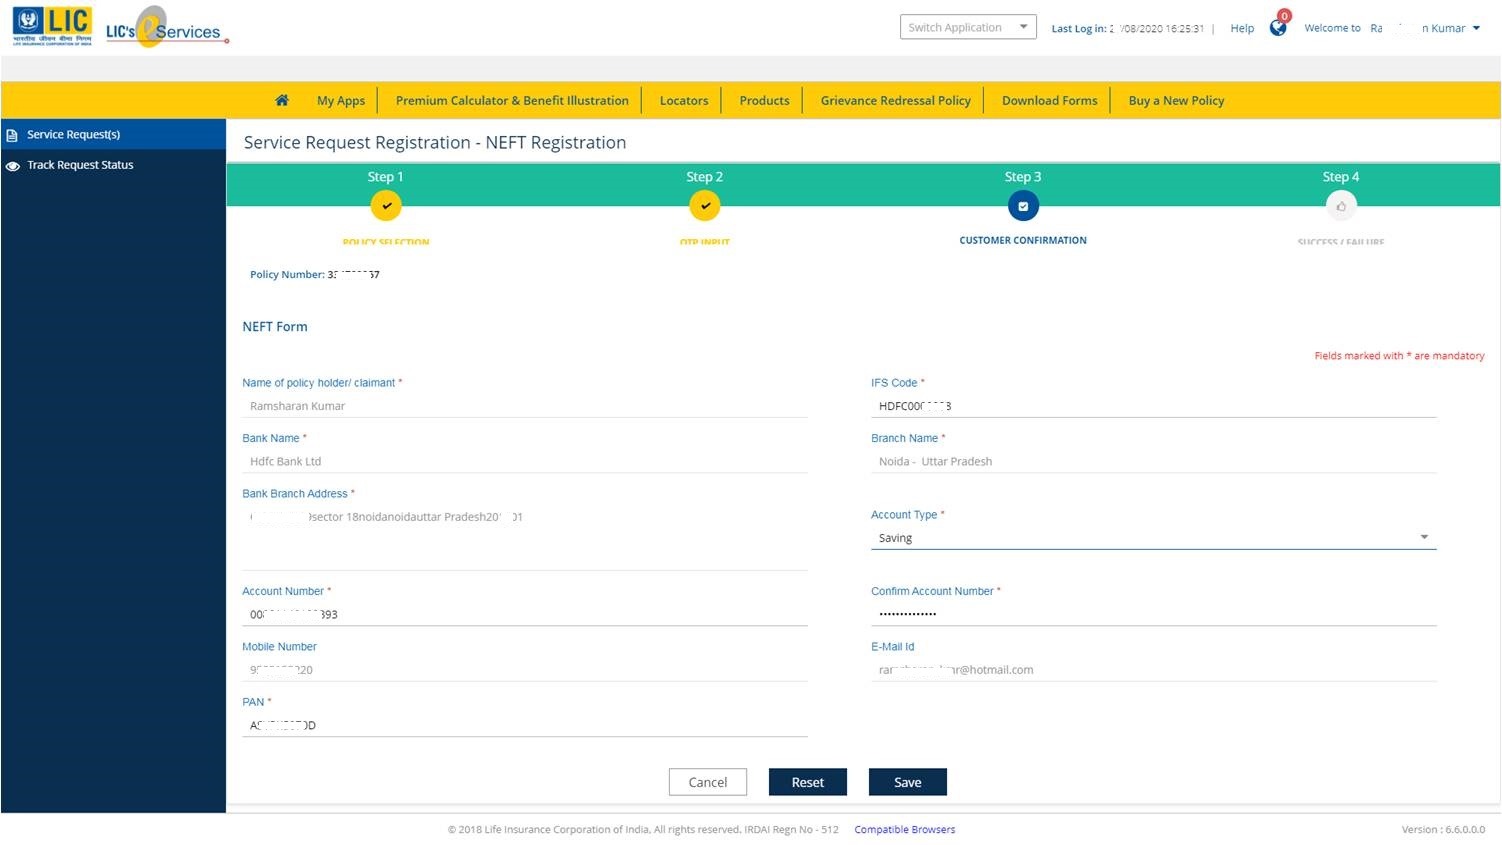 Here, you have to fill your Bank Account IFSC Code. Other details like Bank Name, Branch Name, and Branch Address will appear automatically. Then, select the account type like Saving or Current. Enter the same account no. in both boxes. Then, fill your PAN Card no. The email address is auto-selected. Click on the “Save” button. Next, the screen will show you a confirmation as Success:
  Click on the “Ok” button. At the bottom, you can see an option for generating NEFT Form is active. Click on it to generate. You will receive a pop up asking for a file name to save the generated file or just click save. The system will give some names automatically. Your file is ready in (pdf) format which you cannot edit easily. We will share with you some convenient ways to edit it. Now, you can log out of the portal. We will make a downloaded pdf file ready to upload.
STEP 6: Modify the downloaded file
Open this link to convert pdf file to PowerPoint file online easily – https://www.ilovepdf.com/pdf_to_powerpoint 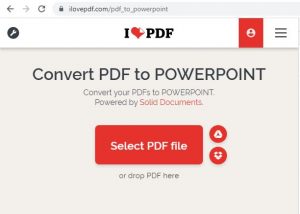 Select the PDF file path and it will convert into PPT. A dialogue box will appear to save the converted PPT file. Open it to edit as required. Knowledge of basic PowerPoint function is needed like Change Theme Colour, Change Image Colour as Grey, Remove Hyperlink, Add Text, and Rotate Text, and so on:
  Once you complete editing then save this file as JPG format. How? Press F12 or take the “Save As” option. Give a new file name like NEFT Registration Form and don’t forget to change “Save As Type”. Select “JPEG File Interchange Format” from the drop-down list.
  Now, you have a JPG file ready to upload. But, the problem is its file size. If it is up to 200 KB then it is OK. Otherwise, we have to reduce the size. How? Open this link to reduce the size online – https://www.imgonline.com.ua/eng/compress-image-size.php
  Just select your image, enter 200 in Compress jpg-file, select No in Copy EXIF and other metadata, and leave other default settings. Click on “Ok”, you will get the same file reduced up to 200 KB. This file is ready to upload.
STEP 7: Log in to LIC’s e-Services Customer Portal again
Login to your LIC’s e-Services Portal again and move ahead as we did. This time you will see an Alert – “You already have a service request / incomplete. Click on the “Ok” button to complete the same”. 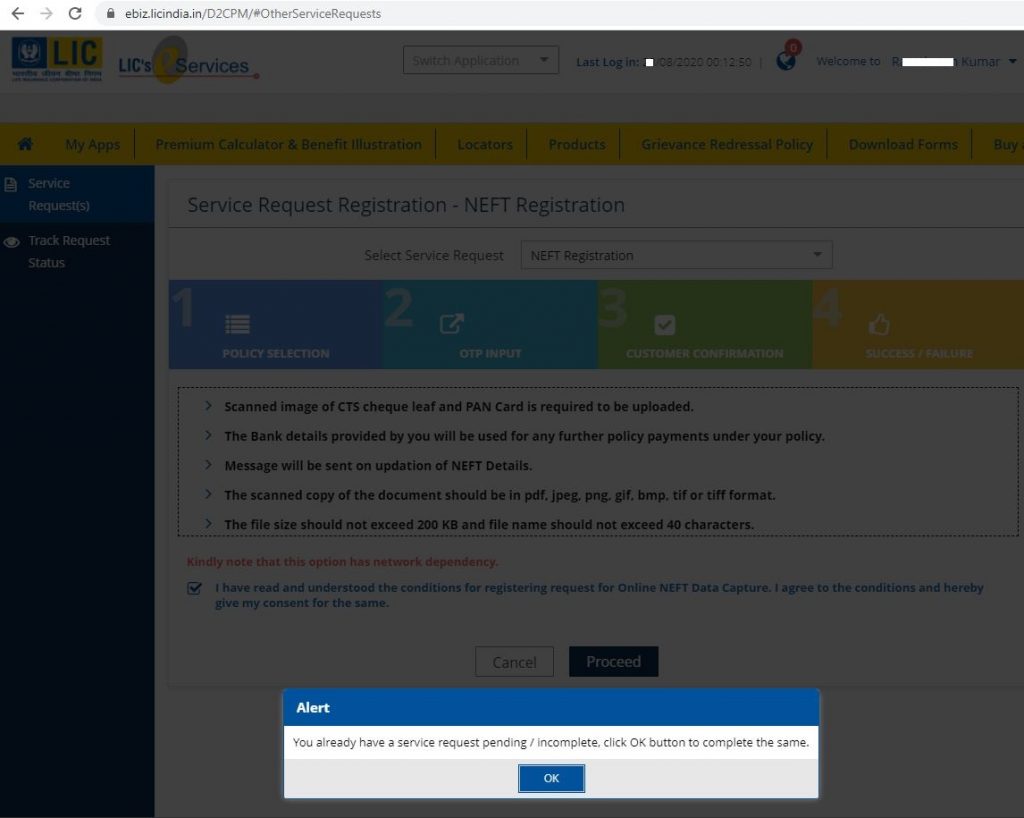
STEP 8: Upload the prepared image file
Click on the “Ok” button. Now, you will get an active option of Browse. Here, you click on it and give the file path. 
STEP 9: Check all the boxes
When you click on Upload then it takes time to upload on the server. After sometimes, you will get a confirmation like – Document Uploaded Successfully: 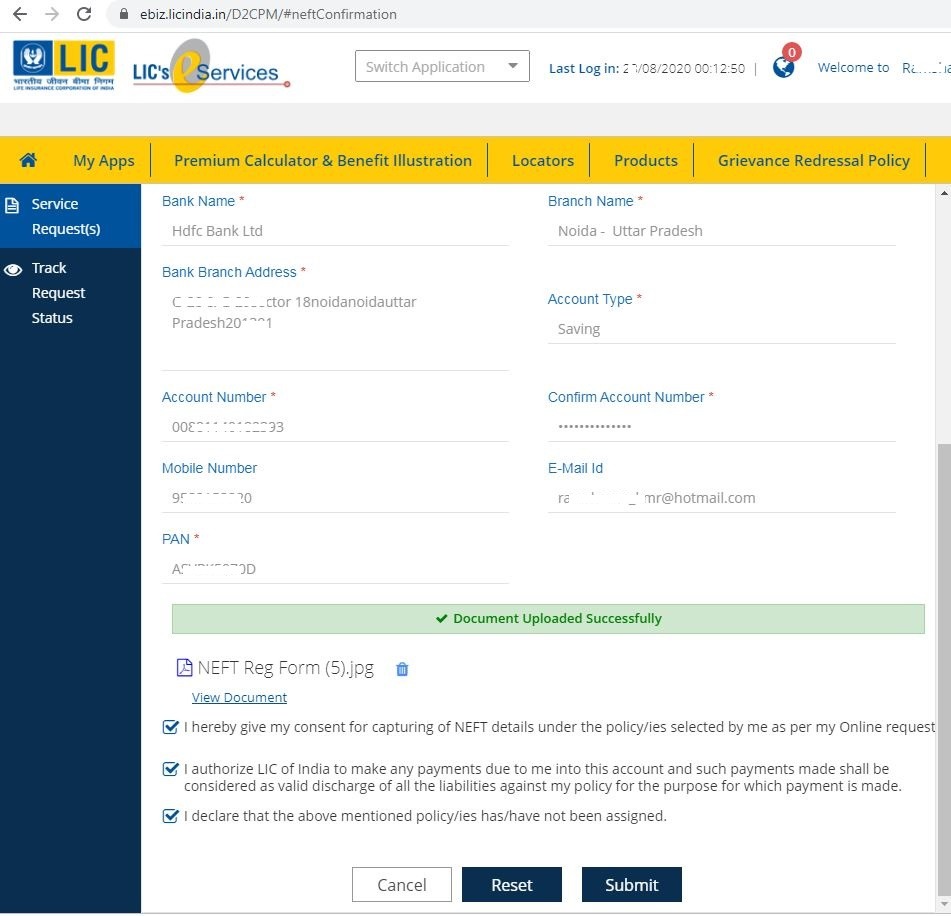 Now, it’s time to accept the conditions and click on the “Submit” button. You will get the final confirmation like – The NEFT Data Capture as per your Service request no. 20211XXXXXX496 will be effected and accordingly intimating will be sent to your mobile number & e-mail id registered with us.
  If you have multiple eligible policies then you can click to the “Yes” button and repeat the process. You will get an SMS confirmation like:
  You will also get e-mail confirmation such as:
STEP 10: Check the request status
You can track your request process progress here:  Thus, we are very confident that your NEFT details will be registered correctly without errors. This method is tried and tested.


0 Comments